How To Do A Hip Thrust Correctly (Your Glutes Will Thank You)

February 8, 2023 - Updated March 31, 2026
When someone asks which exercises you should be doing for lower-body strength, squats and deadlifts tend to steal the spotlight, but hip thrusts should be included in that lineup, too.
Hip thrusts are one of the most effective exercises you can do for building strength in your glutes, hamstrings and posterior chain, and the research backs that up. Whether you're brand new to the gym or you've been lifting for years, here's everything you need to know to do them well.
What muscles do hip thrusts work?
Hip thrusts are a compound exercise, which means they recruit multiple muscle groups in a single movement. The primary muscles targeted are your glutes (specifically the gluteus maximus), but your hamstrings, quads and core all get a workout too.
Because you're working some of the biggest, most powerful muscles in your body, hip thrusts also let you progressively load a lot of weight and progress quickly, which is great news if building strength is your goal.
What are hip thrusts good for?
Beyond the gym, stronger glutes and a stronger posterior chain (all the muscles down the back side of your body) mean your body moves better in everyday life, whether that's walking, running, climbing stairs, or doing heavy lifting.
Hip thrusts also support better posture and can reduce strain on your lower back over time. And if you're someone who struggles with barbell squats due to shoulder, neck or back issues, hip thrusts are a brilliant alternative that lets you load up without the same demands on your upper body.
As for the science, a 2021 study found that peak gluteus maximus activation was higher during barbell hip thrusts than back squats or split squats. A separate 2019 study comparing back squats, Romanian deadlifts and barbell hip thrusts reached the same conclusion. Hip thrusts came out on top for glute activation, even without maximal loading. So if your goal is to grow and strengthen your glutes, hip thrusts deserve a solid spot in your routine.

Glute bridge vs hip thrust: what's the difference?
These two exercises work the same muscle groups, but they're not interchangeable. The glute bridge is done lying flat on the floor (typically with bodyweight or a light load), while the hip thrust uses a bench and a barbell.
The bench elevates your shoulders, giving you a greater range of motion through your hips. More range of motion means more glute activation, and the setup also allows you to load significantly more weight than a floor-based bridge.
Think of the glute bridge as your starting point and the hip thrust as the natural progression. If you're new to both, start with glute bridges, build your confidence and hip mobility, then graduate to hip thrusts when you're ready.
What you need for hip thrusts
A weights bench or stable platform no higher than your knees
A barbell
Weight plates and collars to secure them
A barbell pad - this one's non-negotiable if you're adding plates. Without it, the bar digs directly into your hip bones, and things get uncomfortable pretty fast.
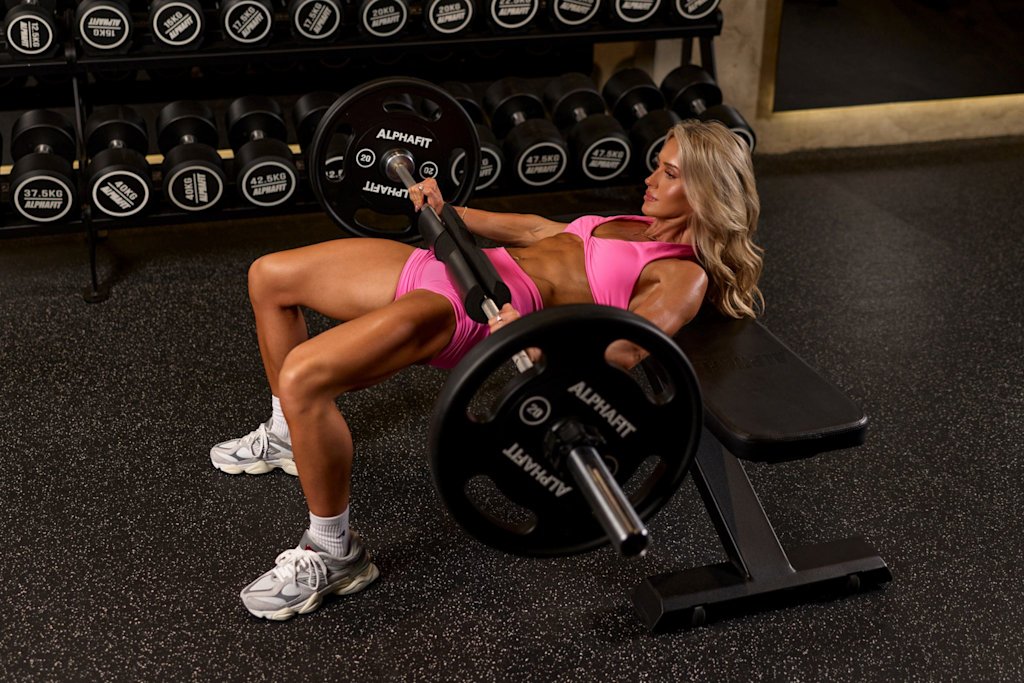
How to do a hip thrust
Place your bench against a wall or solid surface so it can't slide during the movement.
Set the barbell perpendicular to the bench so they form a T-shape, leaving space for you to sit between them.
Sit on the floor with your back against the bench, legs extended under the bar.
Bend your knees and plant your feet flat on the floor. Roll the barbell towards you so it rests across your hip crease, centred. Add your barbell pad before loading if you haven't already.
Grip the bar on either side of your hips with an overhand grip (palms facing the floor). You're steadying it, not lifting it.
Drive through your feet, brace your core and squeeze your glutes as you push your hips up toward the ceiling. Stop when your torso and thighs are roughly parallel to the floor. Your body should form a straight line from shoulders to knees.
Keep your chin tucked and gaze down toward the barbell throughout. This protects your spine and keeps you from hyperextending at the top.
Pause at the top and squeeze, then lower your hips back down with control.
After your first rep, check your position: at full extension, your knees should be at approximately 90 degrees. Adjust your foot placement if you need to before your next rep.
Common hip thrust mistakes
If you want to see results and keep your lower back happy, getting your form right matters.
Overextending at the top: Pushing your hips higher than your knees creates a hyperextended arch in your lower back, and that's when you start to feel it in your back (in a bad way). Keep your core engaged, chin tucked, pause when your body forms a nice, straight line, and focus on control rather than momentum.
Foot placement is off: Feeling it in your quads more than your glutes? Your feet are probably too close to your body. Feeling it in your hamstrings? They might be too far away. The sweet spot is wherever your knees hit 90 degrees at the top of the movement.
Too much weight, too soon: Hip thrusts can handle serious weight, but your form needs to be solid first. If you can't reach full hip extension or your lower back is taking over, drop the load. There's no glory in going heavy if your technique is going sideways.
Moving too fast: The thrust is only half the exercise. Lower down slowly to keep your glutes under tension for longer, or hold at the top for an extra breath to increase the challenge.
Ready to put this into practice?
Hip thrusts feature across several strength programs in the Sweat app! Find the one that fits your goals and get started with a 7-day free trial.
Erin is a writer and editor at Sweat with years of experience in women's publishing, the fitness industry, media and tech. She's passionate about the power of movement, and you can often find her on a yoga mat, a hike, a dance floor, in the ocean or the gym.
* Disclaimer: This blog post is not intended to replace the advice of a medical professional. The above information should not be used to diagnose, treat, or prevent any disease or medical condition. Please consult your doctor before making any changes to your diet, sleep methods, daily activity, or fitness routine. Sweat assumes no responsibility for any personal injury or damage sustained by any recommendations, opinions, or advice given in this article.
Fitness